
Should you Paint your Body with Acrylics?
Using your Body to make Foot and Arm Prints
I had a query recently from an artist who wanted to print with her body.
She wanted to paint her body to make prints on canvas and asked whether my Outlines paints
would be safe to use for this purpose.
Of course I had to say, that although these paints are not harmful to your skin in small quantities,
they are not intended for face or body painting.
Besides, when acrylic paints are dry they can be difficult to remove without a lot of rubbing.
To be clear, you must not just paint your skin with Acrylic paint and leave it there!
When thinking about my answer, I did know that ‘face or body painting‘ rather misses the mark as
painting parts of the body for printing should not involve letting the paint dry.
However, there could be problems if the artist didn’t wash the paint off thoroughly.
I thought experimentation would be an easier, and more interesting, route to finding out what works.
Searching on the internet can be very frustrating and I should think most suppliers would be reluctant to say ‘go ahead’ as there’s no way of knowing exactly how poeple would use the paint.
What if someone took it into their head to print their eye!
What a Horrific thought…
My Bodyprint Experiments
I thought I would carry out some simple experiments myself with my hands, arm and a foot printed on canvas, paper and card. (I thought about a kiss but didn’t fancy the paint on my lips! Maybe another time.)
I started as usual with some planning
Think, experiment and see what works.
I have thought about the paint itself already and I know, it is non-toxic and, that I should still wash my skin quickly, so the washing needed a plan.
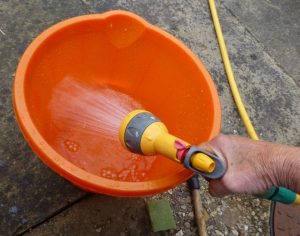
I do not like sending paint-filled water down the drain in case it causes problems in the waste-water system, so I prefer to prepare a bucket or bowl that I can empty in a safe place.
I can wash off the bulk of the paint in it before using the sink for a final, good wash.
I also planned to print on canvas, paper and card so I collected materials together and prepared the surface on some.
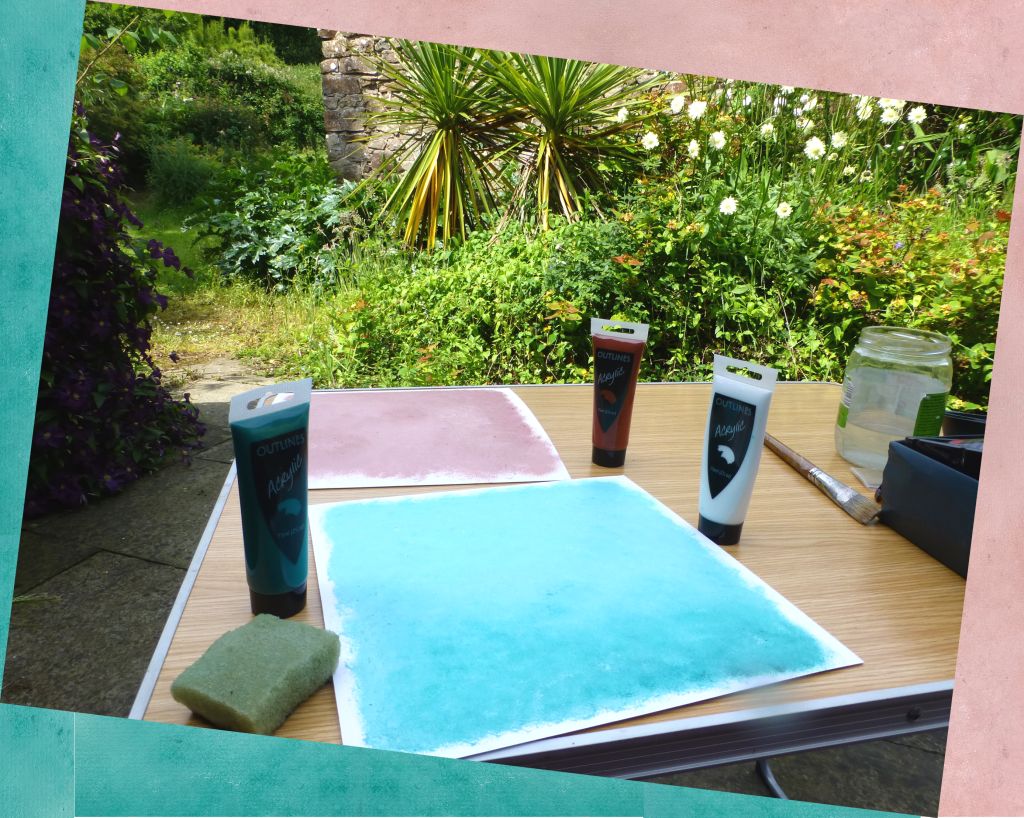
Thinking a coloured background might prove interesting, I painted those and allowed them to dry.
The two backgrounds were done with a piece of sponge dabbed on the card surface. One was a pale mix of Burnt Sienna and white and the other was Viridian green with white. I let the green get slightly darker at one end.
I couldn’t find any prepared canvas in my studio – I must have used it all up! I didn’t want to use a stretched canvas because I thought I might need to apply pressure, so I went ahead without it.
The Experimental Prints
A warm summer’s day in June meant I would paint outdoors in the shade.
I put a camping table and chair in place, together with a bucket and the garden hose at the ready.
The Handprints
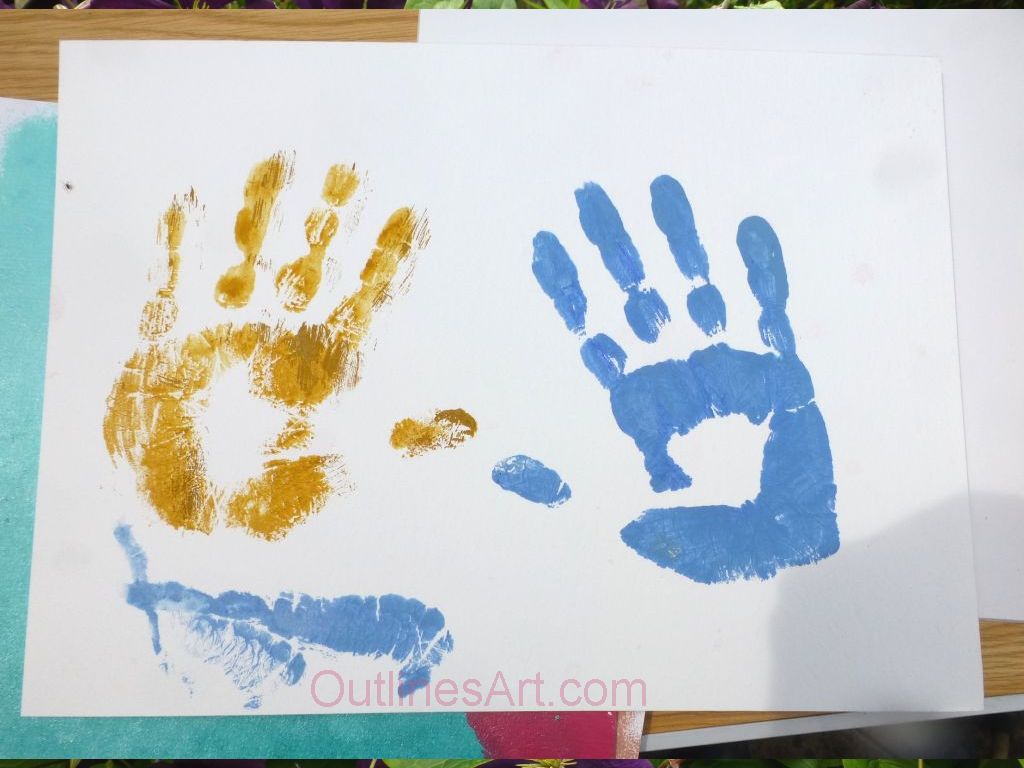
First try was on a thick watercolour paper using Yellow Ochre. I painted it lightly on my hand with paint straight from the tube. It started to dry right away and the first print hardly made a mark.
First lesson learnt – I needed to be quick and the paint needed to be wetter.
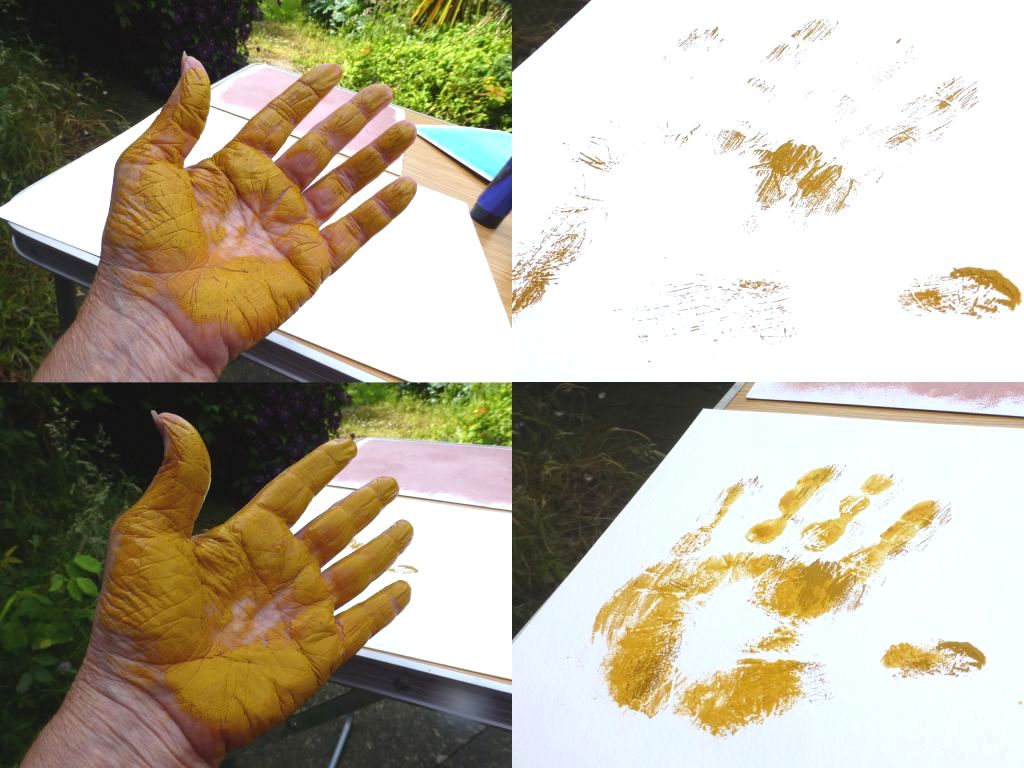
I dipped the end of the paint-laden brush in water and mixed it around in the paint already on my hand, painting it quickly over the first coat. I printed my hand over the first one – result was a bit too wet, but the colour with the white glowing through was pleasant.
I washed my left hand thoroughly, and most of the paint came off easily but I had to scrub the edges of the partly dried-on paint. I have tough skin so it was fine, but delicate skin might have suffered with that treatment.
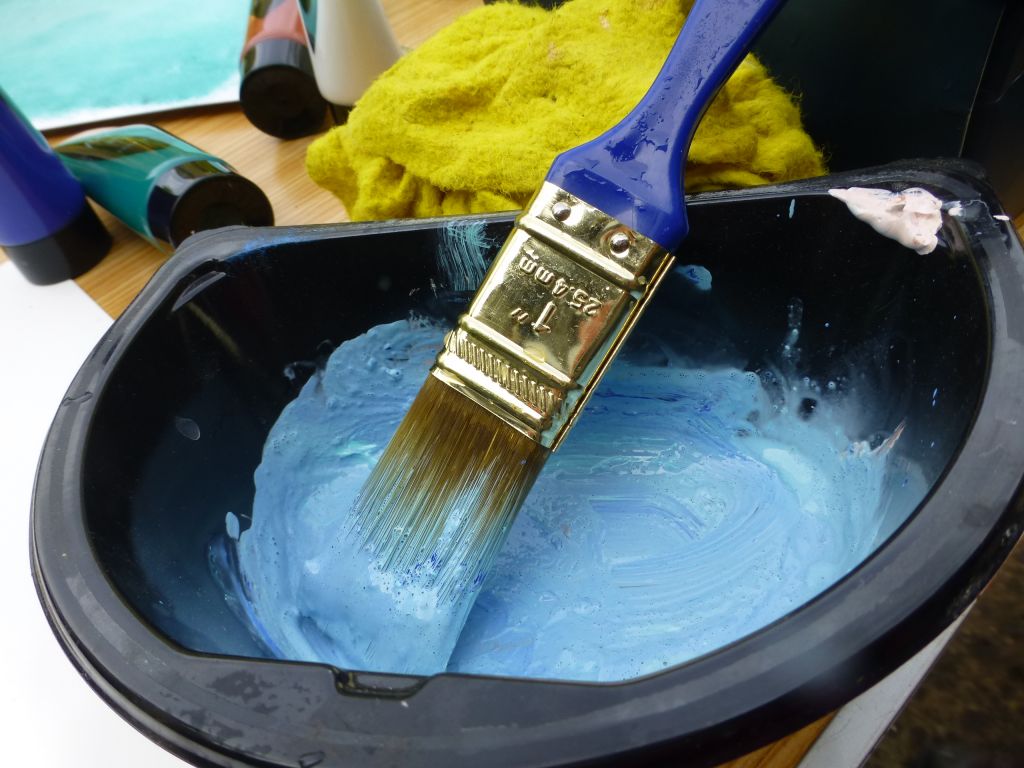
I mixed Ultramarine blue and white in plastic pot I had handy, with a drop of water, and mixed it to a smooth, thick, creamy consistency. This time I painted it with quick strokes on to my right hand so that it covered quite solidly, then pressed my hand on the paper.
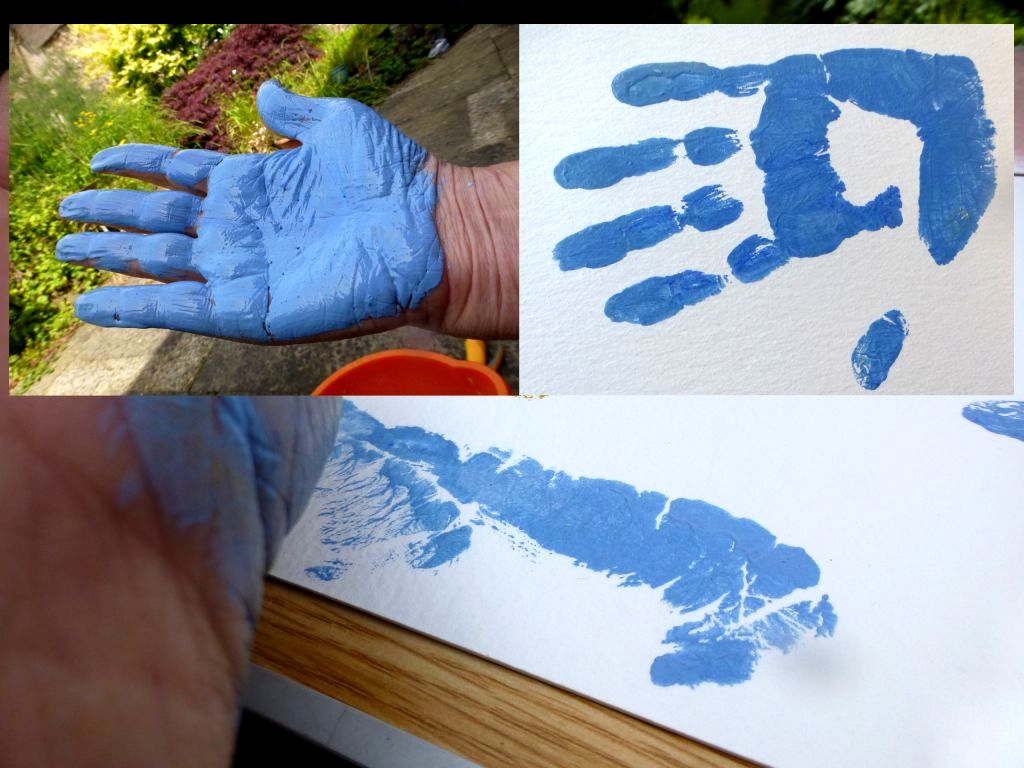
It felt slippery and skidded, just a little.
Second lesson learned – you don’t have to press hard and take care it doesn’t slip!
Having washed myself and everything I had used in the bucket, I tipped the water away and refilled the bucket from the garden hose. The water was quite warm – I wouldn’t like to try this in the cold!
I guess trying to take photos at the same time wasn’t helping, but never mind, the coloured backgrounds were dry and it was time to make a footprint.
The Footprints
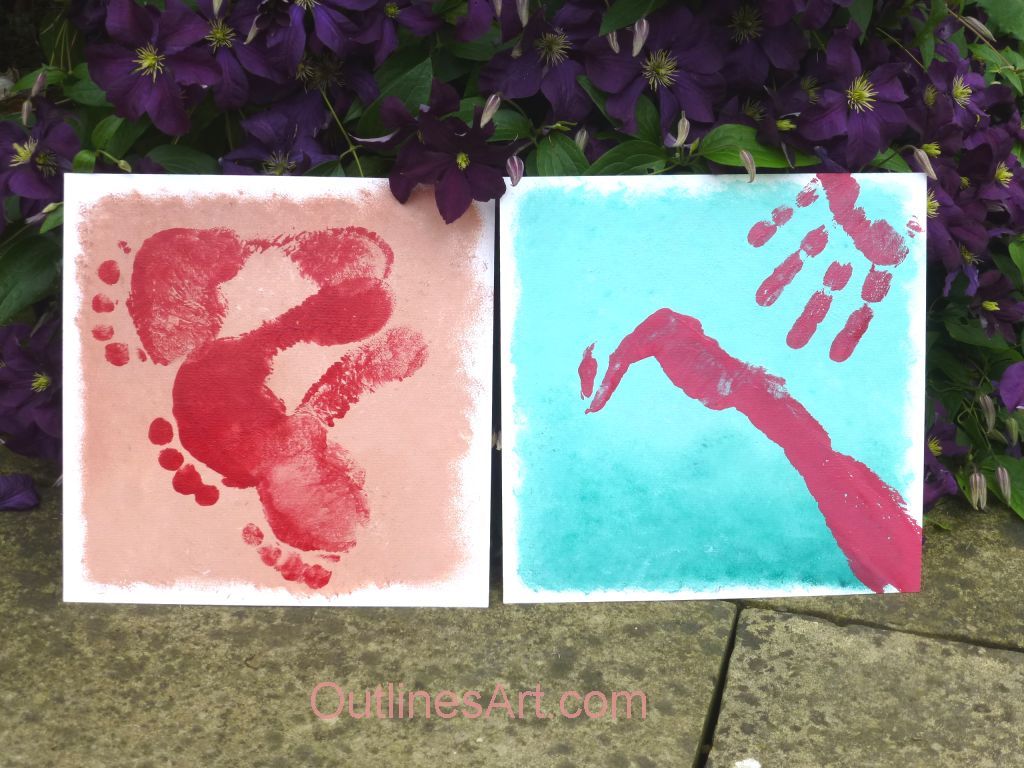
This time I mixed the Crimson paint with very little water which changed the consistency enough to allow it to spread reasonably evenly.
The card was on the paving in front of my chair and I had the bucket nearby, ready to plunge my foot into water after the print was done.
Painting the bottom of my foot was a bit of a challenge – I couldn’t really see what I was doing and did it by ‘feel’.
Plonk! One rather slippery print – without adding any more paint, I quickly made another – and then another. I think the resulting consecutive steps becoming lighter are quite interesting.
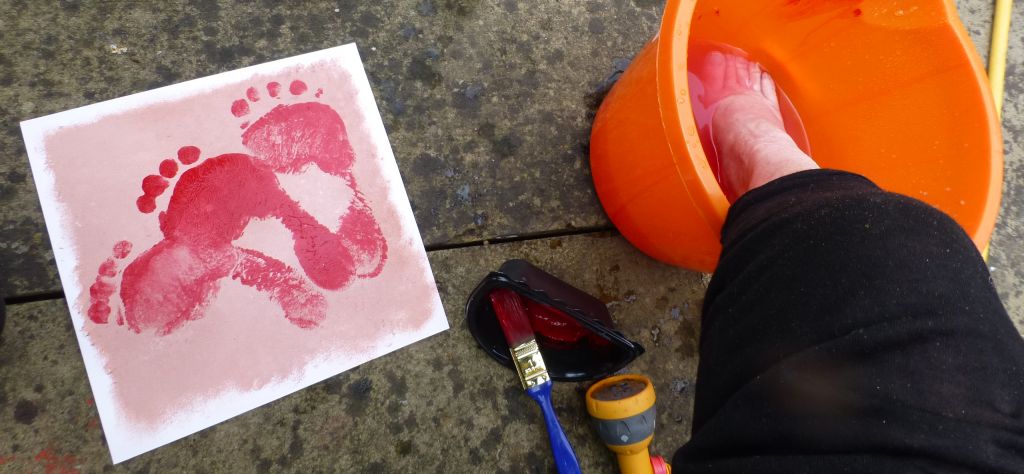
The lesson from this is that, for more control over an art piece, I might have spare boards to practice and to find the perfect mix and paint quantity for the piece.
The Arm and Hand print
Years of painting for hours and tiring my arms out made me learn to switch the hand holding the brush until it became a habit, and now I am lucky that, when it comes to painting, I am almost ambidextrous.
I decided I would paint my right hand and forearm using my left hand.
I wanted the steadier, right-hand control when placing my arm on the board.
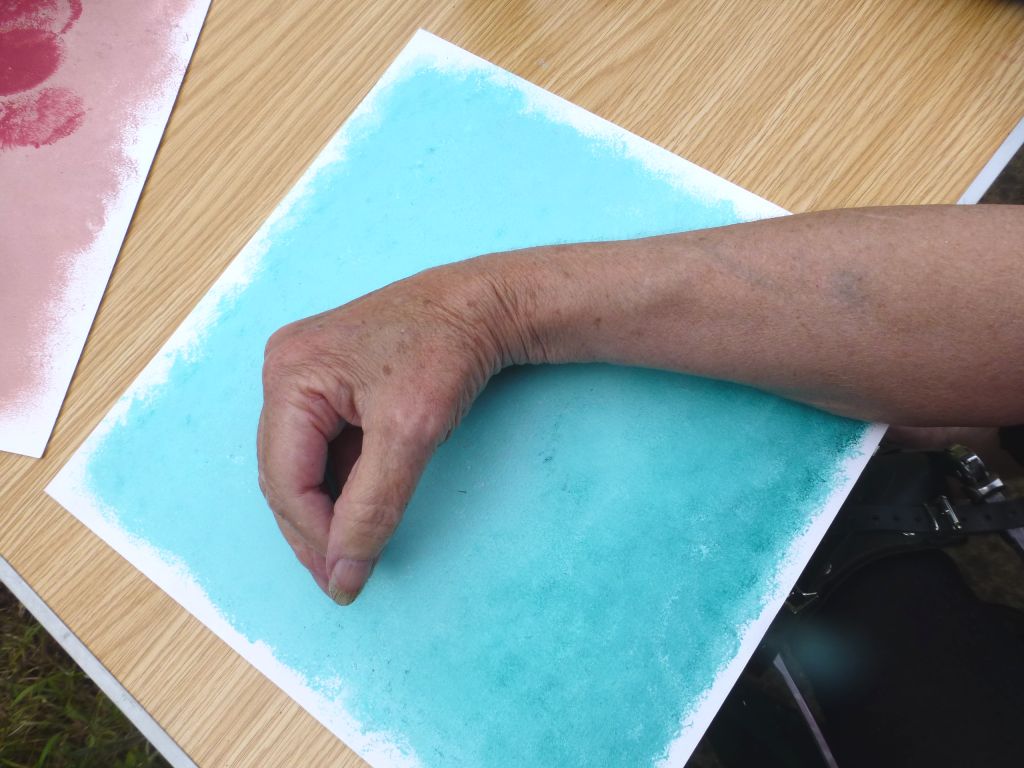
To feel where it touched, and establish where the paint had to be applied, it seemed a good idea to try the position on the board.
There was quite a lot of the crimson paint in the pot so I added some white to make it dark pink and to increase the amount of paint. By now I had some clue about the consistency that would work, and mixed it.
Painting the edge of my hand and the tip of the third finger, then all the way to the elbow would take more paint. I thought it might start to dry too soon so I painted it fairly thickly to keep it moist.
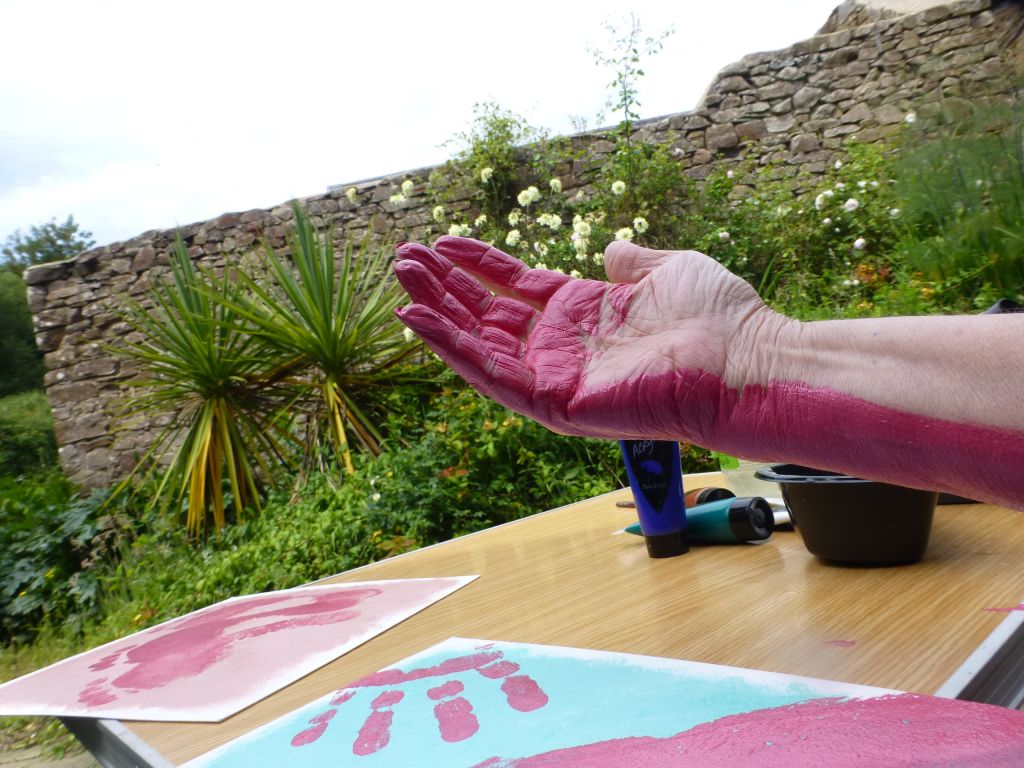
I printed it on the board – it was fine – there was plenty of paint so I painted my fingers for a spread at the top corner too…
While cleaning up and washing brushes, I decided I didn’t need to look for canvas for this experimental project.
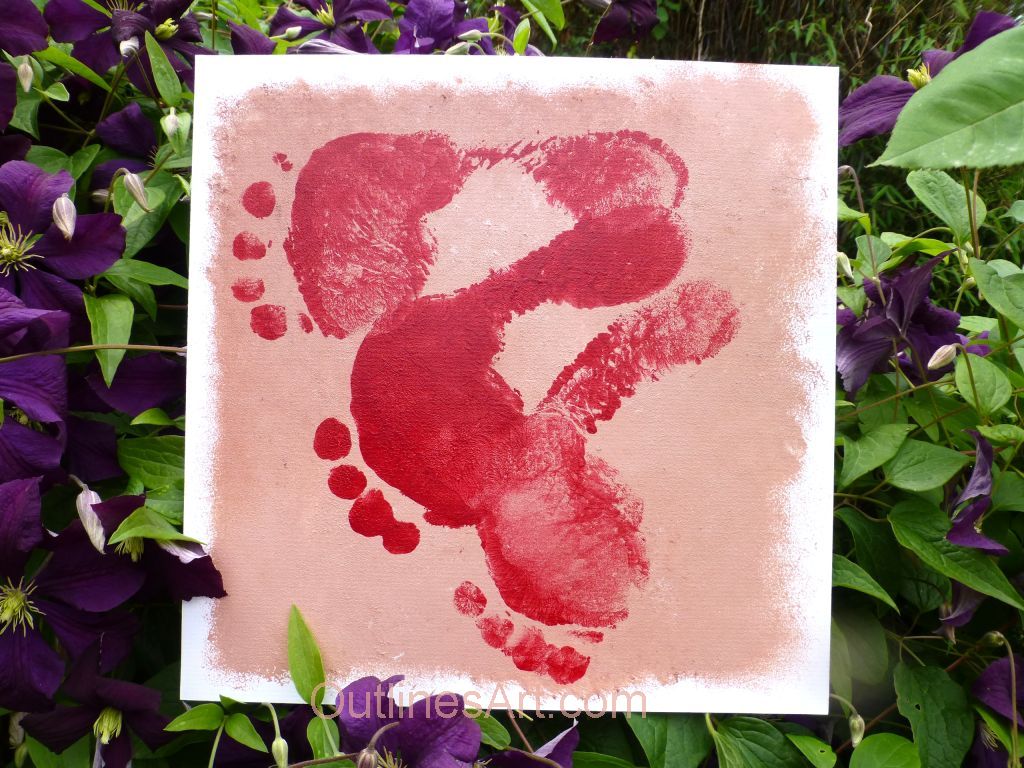
Crimson Feet printed on a pale Burnt Sienna mix
Pictured in a cascade of purple clematis flowers
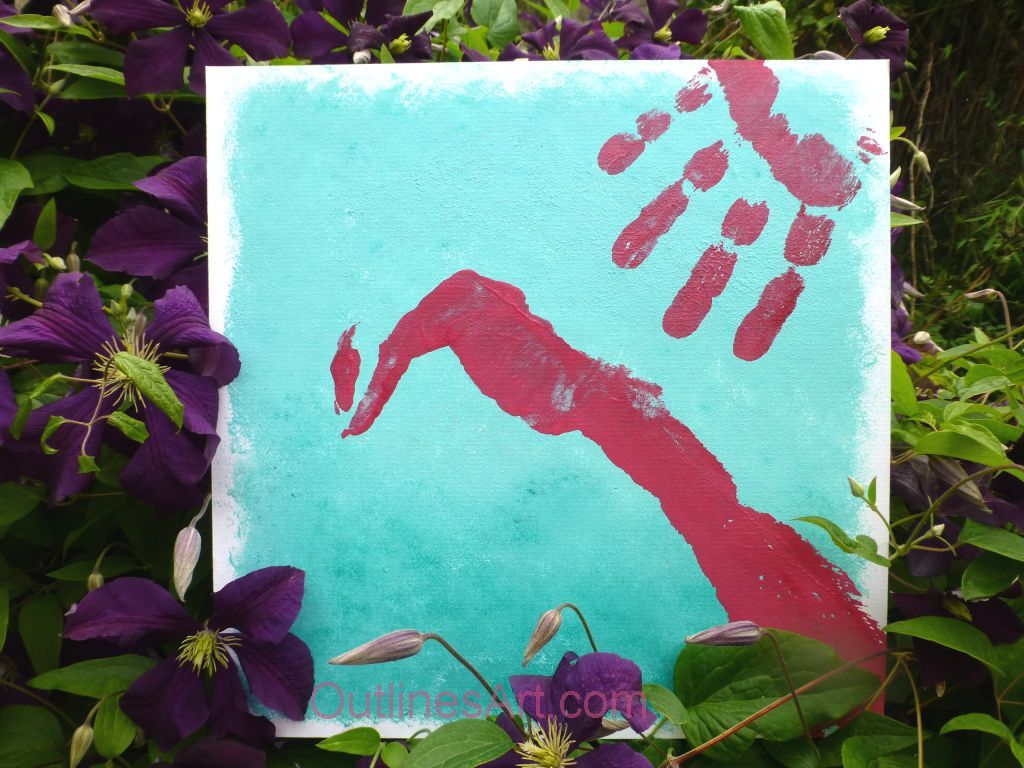
Crimson arm and hand painted on a viridian mix
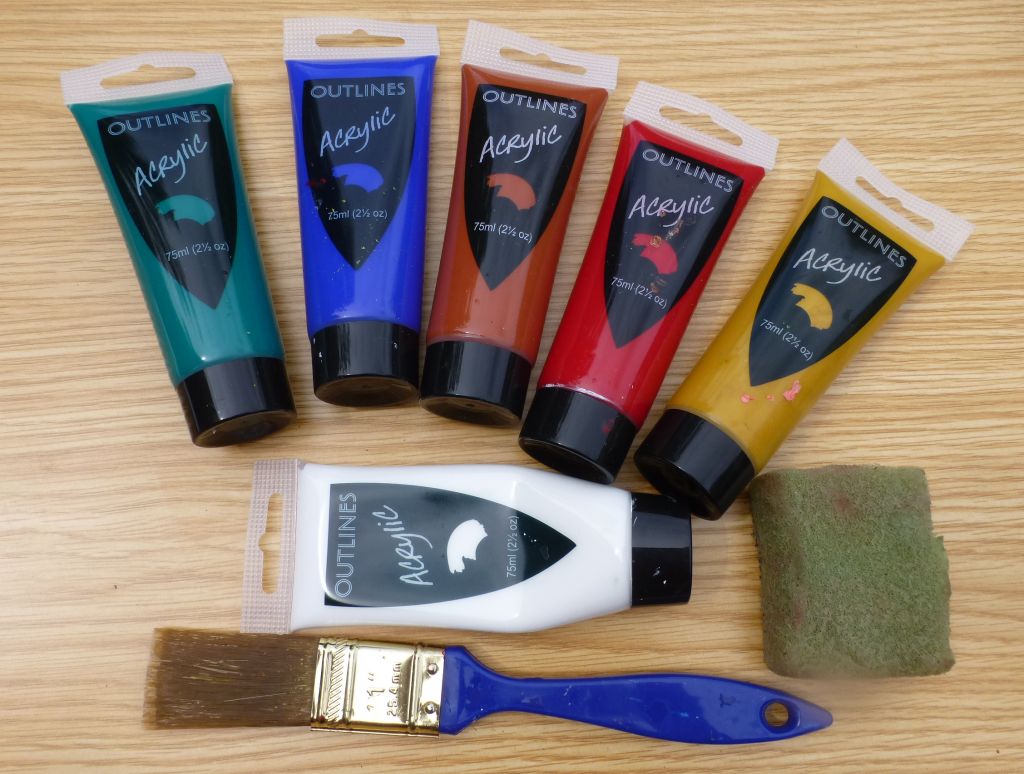
The colours I used were Viridian, Ultramarine, Burnt Sienna, Crimson, Yellow Ochre and White. Colours can be bought individually in the shop as well as sets of twelve colours. A piece of sponge was used to paint the backgrounds and a paintbrush to paint my skin.
The brush I used was is a 1 inch (2.5cm) gesso brush with soft synthetic bristles.
Conclusions
- For printing of any kind, acrylic paint needs to be very slightly diluted to keep it wet for as long as possible and at least until the plate, or body part, is properly washed and the paint cleaned off.
- With the right preparation for cleaning up and plenty of spare material, I could make artworks by printing with small parts of the body.
- I would not attempt to print using larger areas of the body without someone to help clean my skin properly and quickly. Note: And I haven’t tried it.
- I would not attempt to paint sensitive areas of the body at all and would avoid getting the paint in my hair.
- It would be best to do this in a warm environment with warm water to hand as it would not be pleasant to plunge any part of the body into very cold water.
Washing is essential
- By avoiding sensitive parts of the body and starting with small areas, any paint that is not poisonous, is water soluble and washes off quickly and easily would be worth testing.
- Whatever paint you use, you should wash it off your skin, before it starts to dry and, as quickly as possible after you apply it.
- If you have sensitive skin or any allergies, it would be best to avoid using any part of your body as a painting implement.
Experience has told me that I could happily do these tests but, if you are in any doubt, it might be best to find out more before having a go yourself.
Ask someone who has Used Acrylics for Printing
If you know of any artists who have already done it, perhaps you could write and ask them what paint they use.
Playgroups commonly do hand and foot printing with very young children and you could ask them what they use.
This was all about an experiment to test using acrylic paints to make prints from the body. If you have made ‘body prints’, what paint did you use?
It would be useful for other readers to know and you can let us know.